Creating Hugo and Netlify powered website from scratch - Part 2 - Deploy
2018-01-12
In the previous the post I have created the basic skeleton for fresh new Hugo site. In this part, my goal is to show the deployment of it to Netlify. Most of the steps are quite straightforward, but there are some things to be done to actually deploy most up to date version of Hugo.
Getting Started
Before starting this part you will need to have two mains things setup.
- Github - if you are a student grab a look at their student pack, otherwise you can always create a free account there.
- Netlify Account - their free tier is more than enough for hobby projects and will be enough for these series.
I’d say it’s best to setup both of the accounts in that order. Because you can use GitHub to log in to Netlify, what will be needed for later on. Also, create a repository on GitHub for your website.
Local Setup
So now we have to go and initialize git in the root of the website which was created in the previous tutorial. In the nutshell it will look something like:
$ cd ~/path/to/the/root/of/project
$ git init
$ git add .
$ git commit -m "Initial commit"
$ git remote add origin <url-of-your-repo>
$ git push origin master
Netlify
Once the source is up on GitHub we can host it on Netlify. There are CLI tools to do that but we are going to use GUI + config file for it. The config file is needed to specify the version of Hugo which we are using.
To create a new project simply select New Site From Git from the main menu of
netlify.

Choose our vcs provider which is GitHub in my case. Pick the freshly created repository and in the last step choose the branch we want to deploy. We can leave empty fields for build and publish inputs. We will specify those in the configuration file in the source itself.
At this point, deploy won’t fail. But it will return 404, because we haven’t
specified some really important settings. Folder to deploy and command to build
the site.
Just add netlify.toml to the root of the project and fill it with these
settings:
[build]
  publish = "public"
  command = "hugo"

[context.production.environment]
  HUGO_VERSION = "0.32.2"
Simply calling Hugo from command line builds the whole website and puts it in
public directory. This is what we specify in the first section of the
configuration. Next is the version we want to use to build Hugo site. By
default, netlify uses 0.17 which is pretty old by now. I’d suggest to run hugo version and put your version number in HUGO_VERSION. In my case it was
0.32.2.
With that in place, we need to push the master branch again and see the magic happen.
Gotcha #1
With current settings you most likely will get an error looking like this:
5:08:25 PM: Computing checksum with sha256sum
5:08:25 PM: Checksums matched!
5:08:26 PM: Now using node v6.12.3 (npm v3.10.10)
5:08:26 PM: Using version v6.12.3 of node
5:08:26 PM: Using /opt/buildhome/.rvm/gems/ruby-2.1.2
5:08:26 PM: Started building sites ...
5:08:26 PM: Error: Error building site: No source directory found, expecting to find it at /opt/build/repo/content
5:08:27 PM: Build complete: exit code: 255
5:08:27 PM: Cleaning up docker container
5:08:27 PM: Error running command: Build script returned non-zero exit code: 255
5:08:27 PM: An error occurred while building the site, skipping the deploy and cache refresh.
5:08:27 PM: Build script returned non-zero exit code: 255
5:08:27 PM: Finished processing build request in 9.921794417s
what we are missing is all of the empty directories from the Hugo project. To
fix that we need to include those folders in git. And to do that it’s
enough to just touch on files in empty directories.
$ touch {content,data,layouts,static}/.gitkeep
As a side note on what this does. The curly brackets are used for bash expansion. It’s shorthand for:
$ touch content/.gitkeep data/.gitkeep layouts/.gitkeep static/.gitkeep
and the .gitkeep doesn’t have any meaning. It’s simply a trick to make sure
that git adds the empty directories to the commit. So now running
$ git add .
$ git commit -m "Add empty folders"
$ git push origin master
Should trigger the deploy and if everything went fine we should see successful deployment in our netlify console.
Custom Domain and HTTPS
One of the killer features of netlify is the ability to easily setup custom
domain names with https. Free of charge. To do that just purchase the domain
name and add it to the settings of the website. You can find it in Settings > Domain management > Add Custom Domain. Also you need to configure new DNS
zone. This will give you nameserver address list which will look something like
this: 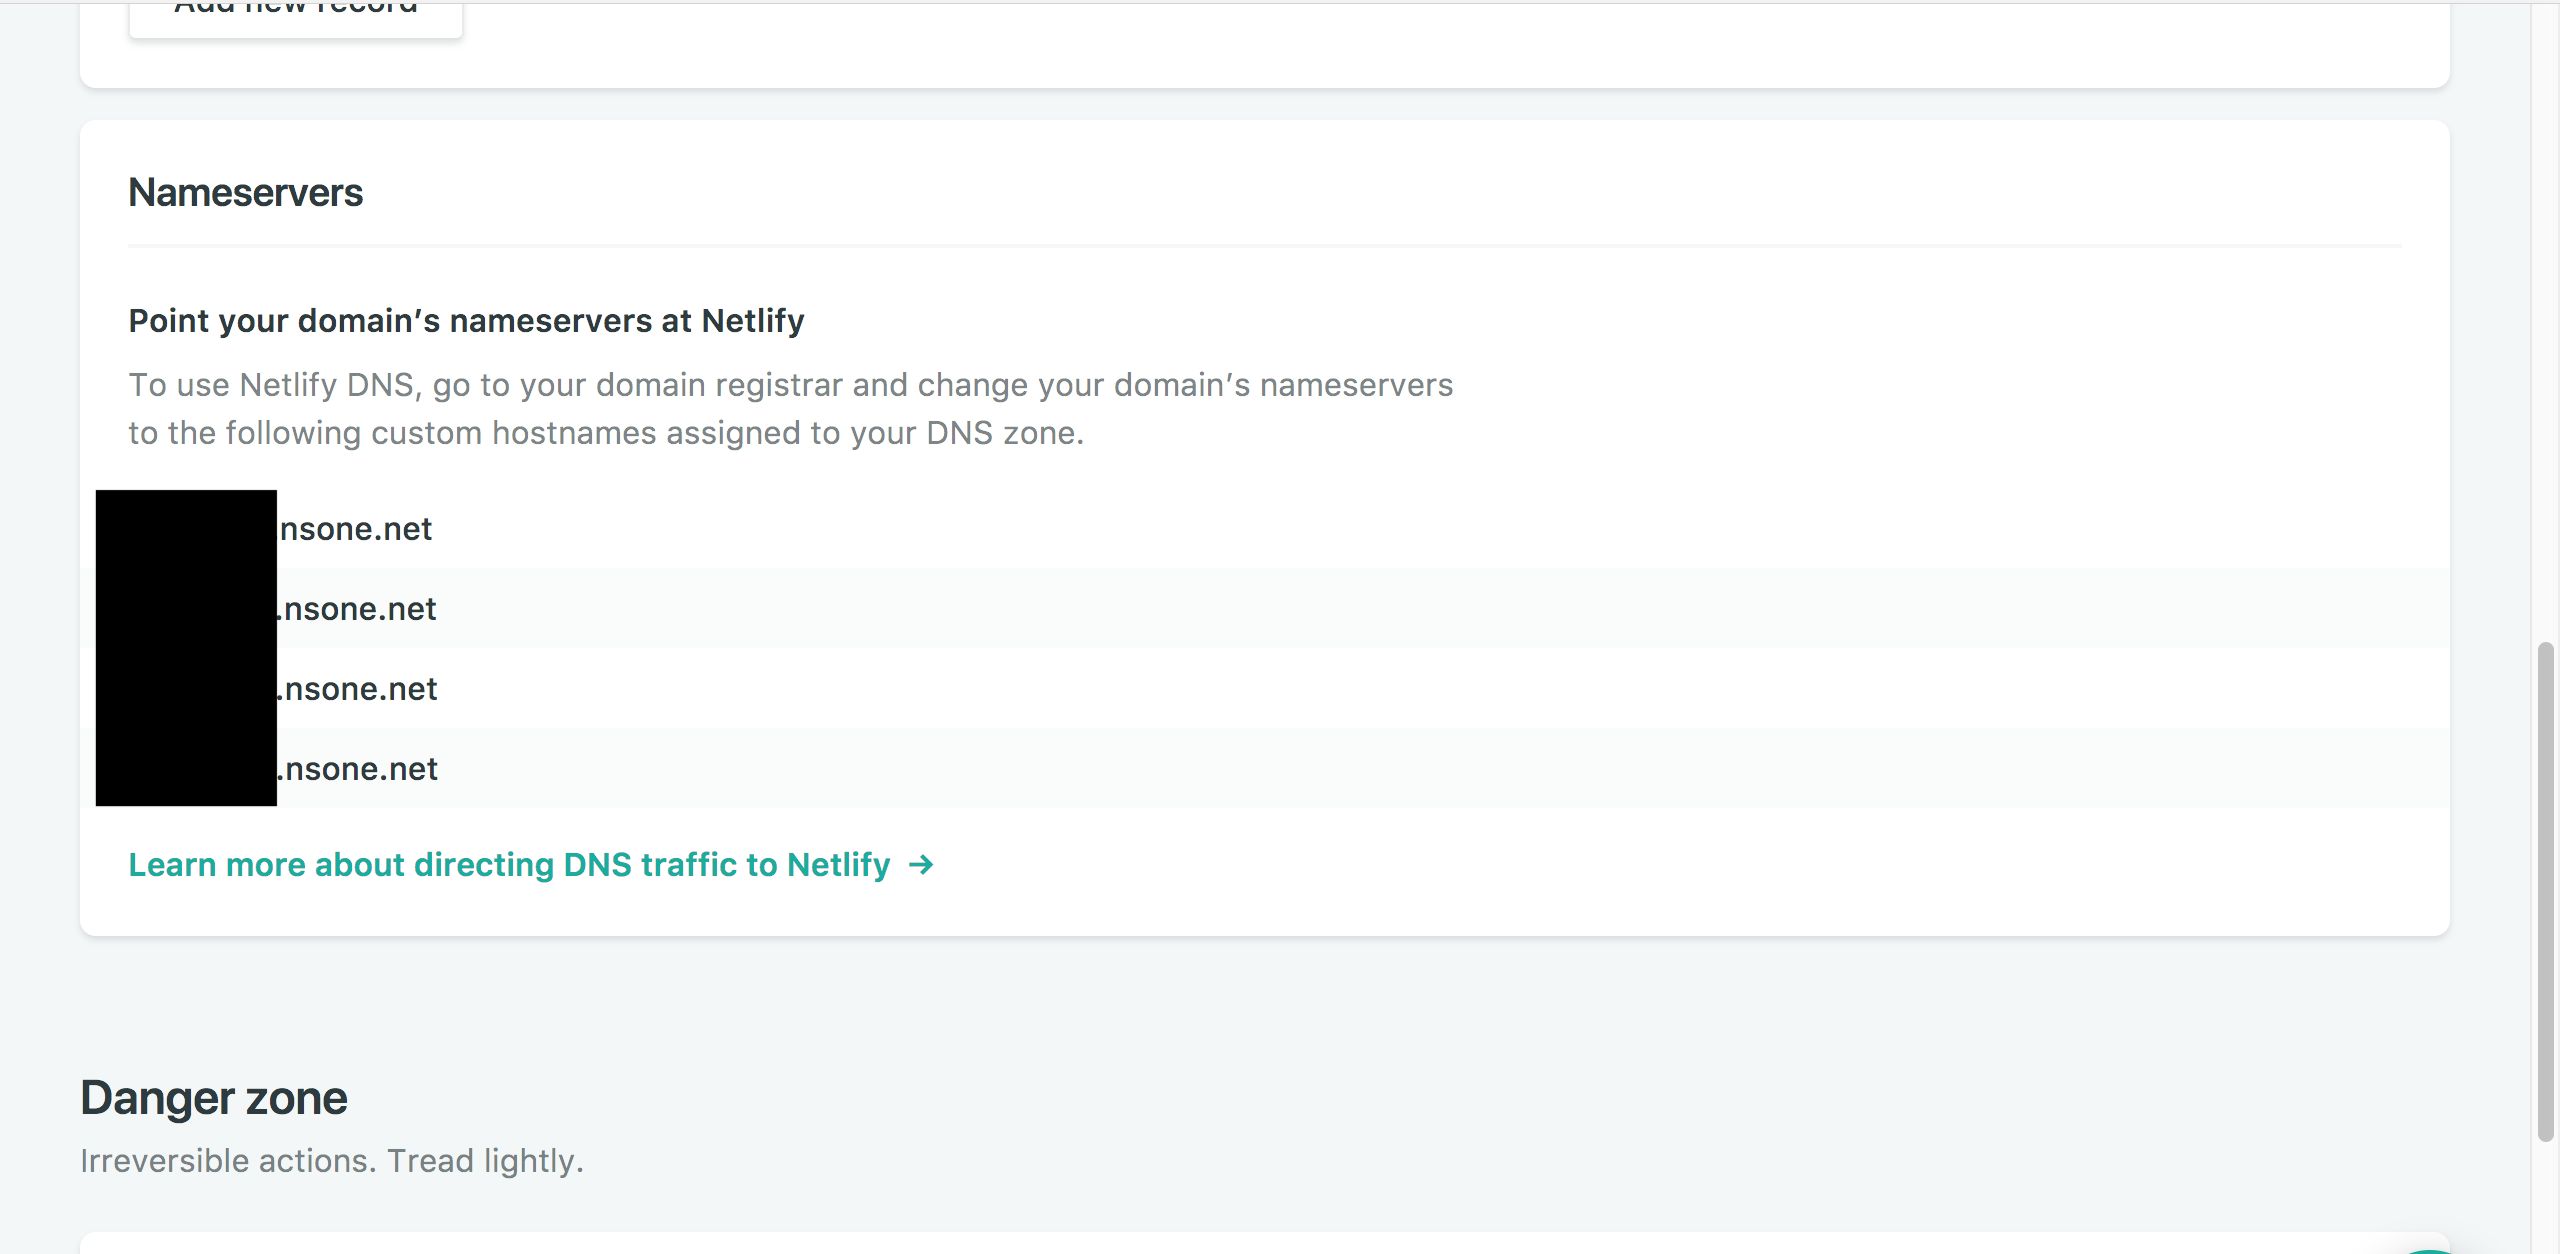 You
will need to add it to your domain providers settings. In my case I’m using
Namecheap and that’s looked like this:
You
will need to add it to your domain providers settings. In my case I’m using
Namecheap and that’s looked like this: 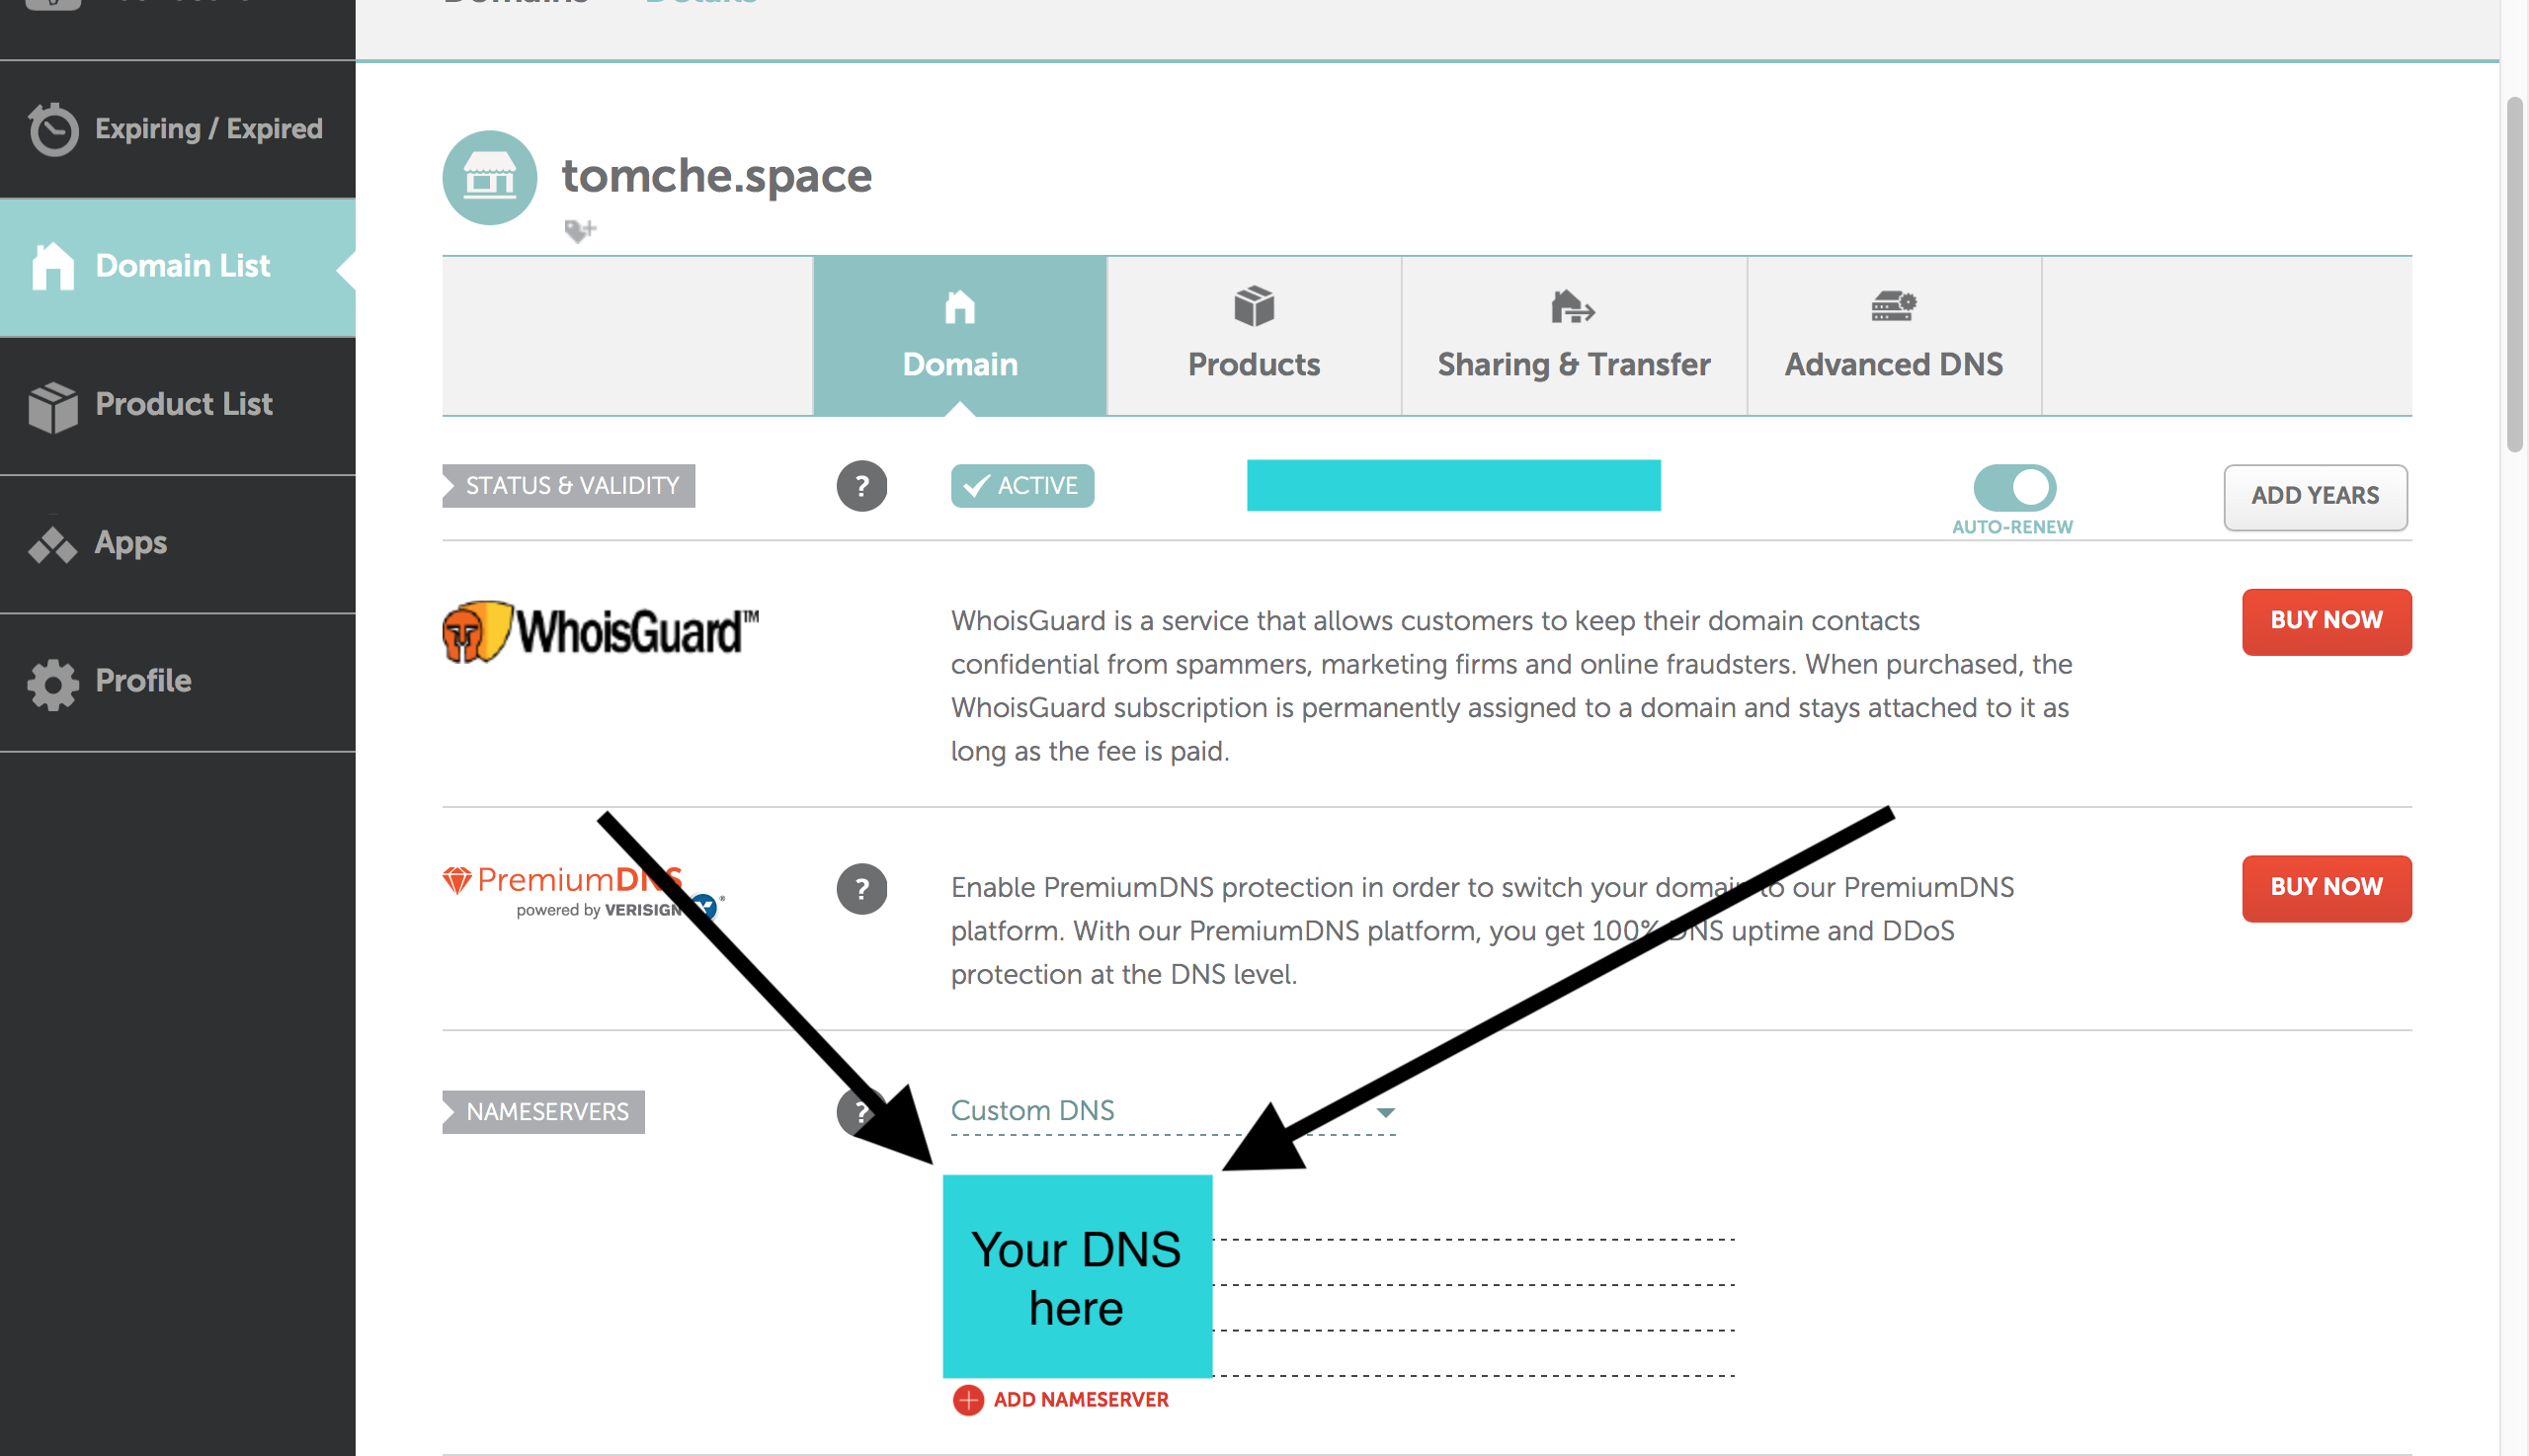 Keep in mind that DNS might take
up to 48 hours to update in some cases so don’t go all in with HTTPs until you
know 100% that your domain name resolves.
Keep in mind that DNS might take
up to 48 hours to update in some cases so don’t go all in with HTTPs until you
know 100% that your domain name resolves.
Once you are sure that domain works just enable HTTPS.
Gotcha #2
So if your site is https now and you try to access it might not load the
static assets. Especially if you enabled https only mode. To solve this problem
will need to edit config.toml. Simply make sure that:
baseURL = "https://www.tomche.space"
has https in it. Pushing to the repository now should fix the problem.
What’s next?
So now we have a basic website and it is live in the cloud. Next on the list is to actually start filling it with content and make a structure for it. While I won’t go into to much detail on styling and layout I will though touch on how Hugo templating system works.